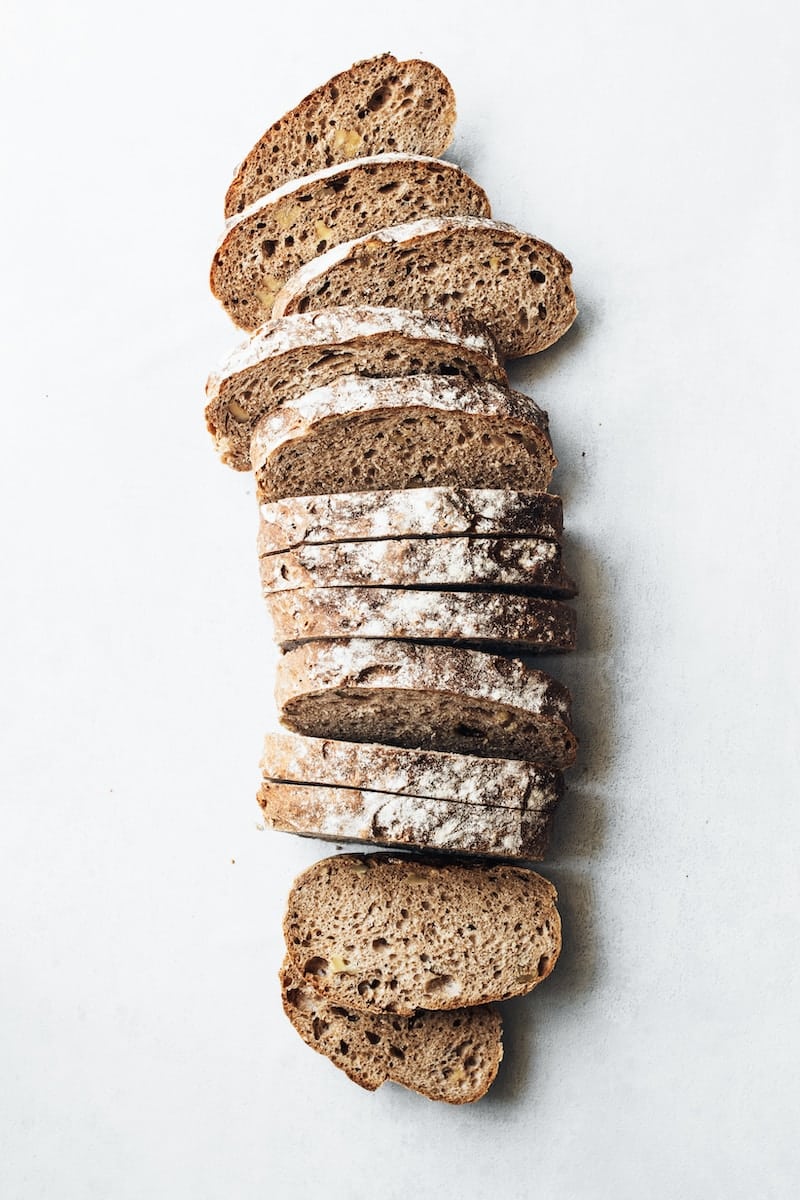
Baking artisan bread at home may seem like a daunting task, but it’s a lot simpler than you may think and it only requires a few basic ingredients: flour, water, yeast, and a pinch of salt. With a bit of time and patience, you can turn these humble ingredients into a loaf of bread with a crackling crust and soft, airy interior.
The process of making bread is a fascinating journey, from the initial mix of flour and water to the final product, golden and fragrant, pulled from the oven. This guide will walk you through each step of the process, demystifying the art of bread making and helping you achieve the perfect loaf.
A découvrir également : The joy of baking classic french pastries
Before you start, it’s important to understand the role of each ingredient in your bread dough.
Flour is the backbone of the dough, providing structure and absorbing the liquid to create the dough’s body. Its proteins, when combined with water, create gluten, which gives bread its texture.
Avez-vous vu cela : The joy of cooking with exotic fruits
Water hydrates the flour, activates the yeast, and dissolves the other ingredients. Its quantity determines the dough’s consistency.
Yeast, either fresh or dried, is the leavening agent that makes the dough rise. It feeds on the sugars in the flour, producing carbon dioxide gas that inflates the dough.
Finally, salt enhances flavor and strengthens the gluten structure. Without it, the bread will taste bland and have a weaker structure.
The process of making bread generally involves six steps: mixing, kneading, first rise, shaping, second rise, and baking.
The first step in making bread is to mix the ingredients. Start by dissolving the yeast in the water and let it sit for a few minutes until it becomes frothy. This indicates that the yeast is active. Then combine the yeast mixture with the flour and salt in a large bowl.
After mixing, kneading follows. This step develops the gluten network that gives bread its structure. Knead the dough until it becomes smooth and elastic. This may take around 10 minutes by hand or about 5 minutes if using a stand mixer.
Once your dough has been kneaded, the next step is the first rise, also known as proofing. This is when you let the dough rest and allow the yeast to work its magic. It will ferment the sugars in the dough, creating carbon dioxide gas that causes the dough to inflate.
Place the dough in a lightly oiled bowl, cover with a damp cloth and leave it in a warm place. The dough should double in size, which typically takes 1 to 2 hours.
After the first rise, the dough is deflated or "punched down" to release the gas bubbles. It is then shaped into a loaf. This can be a simple round ball for a boule, or an oblong shape for a baguette, or any other shape you desire.
The shaped dough undergoes a second rise, also known as ‘proofing’, to allow it to expand and gain volume. This second rise is shorter, generally around 30 minutes to 1 hour.
Finally, the moment you’ve been waiting for! Baking transforms your dough into a beautifully browned loaf. The high heat of the oven causes the dough to undergo ‘oven spring’, where it rapidly expands, and the crust to brown and harden.
Preheat your oven and if you have one, place a Dutch oven inside. The Dutch oven’s heavy walls heat evenly, creating an ideal baking environment for your loaf. Transfer your bread into the Dutch oven or directly onto a baking stone in the oven and bake as per the recipe instructions.
Sourdough bread takes the bread-making process to a different level. Instead of using commercial yeast, you’ll cultivate your own sourdough starter. A starter is a mix of flour and water that captures wild yeast from the environment.
Feeding and maintaining your starter is a little like having a pet. You’ll need to feed it regularly with equal parts flour and water to keep the yeast alive and active.
The process of making sourdough bread is similar to making regular bread, but instead of yeast, you add a portion of your sourdough starter to the mixture. You then proceed with the steps of kneading, first rise, shaping, second rise, and baking as usual.
Bread making is as much an art as a science, and it can sometimes produce unexpected results. Here are some common issues and their solutions:
Baking artisan bread at home is a rewarding experience. Nothing quite compares to the smell of freshly baked bread wafting through your home, and the sense of achievement that comes from having made it yourself. With these tips and techniques, you’re now ready to embark on your bread-making journey. Happy baking!
Understanding the different types of flour and their characteristics can significantly enhance your bread-making experience. The bread flour commonly used in artisan bread is high in protein, allowing for strong gluten development and a nice, tall rise. However, experimenting with other types of flour can provide your bread with unique flavors and textures.
Whole wheat flour includes the entire wheat kernel, providing more fiber, nutrients and a deeper, nuttier flavor. However, the additional bran and germ can weigh down your bread, preventing it from rising as high as bread made with bread flour.
Rye flour is another option that imparts a distinctive, tangy flavor to your loaf. However, since it’s low in gluten, it’s usually combined with wheat flour to ensure a good rise.
For a more delicate loaf, you can opt for all-purpose flour, which has a lower protein content and yields a softer, tender crumb.
It’s important to remember that all these flours absorb water differently, so you might need to adjust the hydration level in your bread recipe accordingly.
Temperature plays a vital role in bread making. Yeast performs best at warm temperatures, ideally around 24-27°C (75-80°F). If your kitchen isn’t warm enough, you can place your bowl of dough in an off oven with the light on to create a warm environment for the yeast to work.
During the baking process, heat stimulates the yeast activity causing a rapid rise in the dough, known as ‘oven spring’. A high initial oven temperature can help maximize this oven spring, giving your loaf a good volume. This is why many bread recipes suggest starting the baking in a very hot oven and then reducing the temperature to prevent the crust from burning.
It’s also worth mentioning the use of a Dutch oven for baking your artisan bread. The Dutch oven traps steam from the baking bread, creating a moist environment that helps the bread to rise and forms a crispy crust. It also provides even heat distribution, which is crucial for even baking.
Baking artisan bread at home may seem complex, but with practice and understanding, it becomes an enjoyable and rewarding journey. Remember, the key to success is patience, persistence and a willingness to experiment.
Whether you’re making a simple loaf with bread flour and commercial yeast, or diving into the world of sourdough with a homemade sourdough starter, each loaf is a testament to your skill and creativity.
Recording your bread-making experiences, including the types of flour used, room temperatures, and proofing times, can be beneficial. This record serves as a personal reference guide, helping you understand what works best and what needs to be tweaked in your baking process.
And finally, don’t forget to share your freshly baked loaves with friends and family. After all, one of the greatest joys of baking is sharing your creations with others. Happy baking!